A lenient twist on the "item a day" craft challenge

The "item a day" craft challenge has always intrigued me. But it's a huge commitment! Lots of crafters have work, families, and other obligations that may prevent them from crafting every single day. So I decided to see if I could make 7 things a week. Let's see how long I can keep this up.

Sunday, December 30, 2012

Week 37: Gifty Goodness

Ahahahah!  CHRISTMAS IS FINALLY OVER!  Not that I don't enjoy the holidays; I've made my peace with them as an adult.  Having a super cool family / friends group helps a lot, and having a two year old (almost!) nephew really brings the holiday spirit home.  But I've been going crazy because I've made a bunch of cool things that I couldn't post for fear of spoiling some of my gift surprises.  So here's what I whipped up in the last seven days for gift giving purposes:

Wire Wrapped Quartz Earrings
Shoulder-duster style long quartz crystal earrings with peridot, amethyst, and citrine accents. 
Wire Wrapped Text Pendant
Altered chandelier crystal pendant.  I faux antiqued some text from a magazine using Distress Inks,  then tore up the page and modpodged it onto the back of the crystal.  A little wire wrapping at the top finished it off nicely.  I like this so much that when time permits (haha) I'm going to make one for myself!
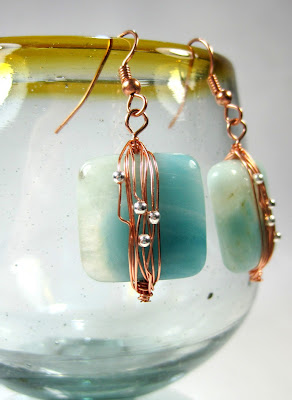
Wire Wrapped Copper and Stone Earrings
Wire wrapped copper earrings.  I don't know what kind of stone  this is, but it's a really pretty blue.  The stones came from the big batch of stuff that Ruby gave me.  It's the gift that keeps on giving! 
Fluorite and Amethyst Herringbone Wire Wrap
Amethyst and fluorite pendant.  I  have a friend that really loves the look of the herringbone style wire wrap, so I decided to see what I could do with a multiple stone style design.  It's big, but it's pretty cool.  I may be the most excited about giving this one away.  : )
Leaf and Vine Wirework Necklace
And for the nature lover, a very minimalist wire wrap leaf design.  No bells or whistles,  just a leaf silhouette with some curly vines.  My husband thought they were strawberries, which I think would go over with the intended recipient just as well as leaves would.
Wire Spiral Earrings
Copper wire spiral earrings.  I'm terrible at making wire wrapped earrings because it's so hard for me to create a duplicate of a design, and these were no exception.  Making matching spirals by hand is really hard!  :)
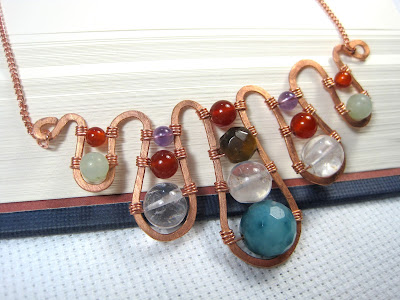
Multi-stone Wirework Pendant
And finally, the "ripple" style wire wrapped necklace.  It's a super fun way of getting a lot of stones into one wrap, and I expect I'll be messing around with this design more in the future.
Sorry to be short this week but the New Year is calling!  I've got to go out and buy sauerkraut (it's a family tradition to eat a little on New Years Eve for good luck), and get ready for my sister's birthday.  Whoo!  Happy New Year everyone!

Sunday, December 23, 2012

Week 36: I Feel Special

It's been pointed out to me that while I make an awful lot of stuff, I don't normally make things with myself in mind.  So this week, I decided to only make things that I knew I would use, and use regularly.  It turns out that my aesthetic is mostly black and silver based.  Big surprise there!  But it's kind of neat; I feel like I have a cohesive "line" of accessories for my everyday use now.  So, uh, Merry Christmas to me?

Feathered Brooch
Hat Pin!  Just not in the traditional sense.  I love adding a bit of extra flare to my hats.  The button was a super cool find at Joann's, and I  used epoxy clay for the first time to put the feathers and button together on the pin back.  For a first attempt I'm pretty pleased.  Plus, giant feather poof for my hat!
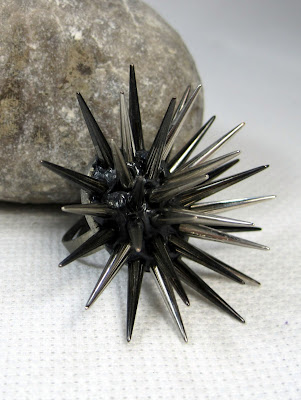
Spike Ring with Epoxy Clay
My second experiment with epoxy clay.  The ring base and spikes are both from Michael's;  the spikes appear to be some sort of plastic so the ring is really lightweight!  While this is totally not a work appropriate ring, I' think I'm going to end up wearing this a lot.  Plus I think it may double as a self-defense weapon in a pinch.  :)
Tassel and Rhinestone Vintage Style Necklace
WWTWW?  Or, What Would Tom Waits Wear?  If he was a girl, I think it'd be this necklace.  This bad boy is much fancier that I'd normally go with, but a girl's gotta play dress up sometime, right?  
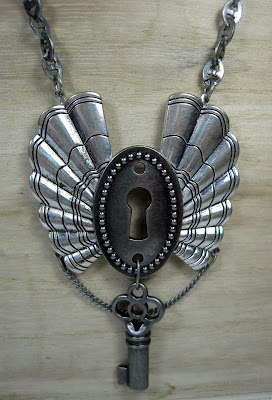
Steampunk Style Keyhole Necklace
I about peed myself when Michael's came out with their Art Nouveau  line of jewelry  components.  I was particularly taken with the fan-style wings.  Add a keyhole and skeleton key charm, and it's perfect!  I'm surprised at how much I wear this necklace.  It's pretty much a staple of my wardrobe now.
Steampunk Style Key With Wings Necklace
And if I don't feel like wearing the super sized version from above, here's a downsized version for more casual wear.  Keys and wings.  I don't think you can go wrong with that combo!
Steampunk Style Clockwork Key Necklace
Once I got my box of keys out, I just couldn't stop!  These flat backed keys are from the scrapbooking isle at Joann's, and they're perfect for my favorite type of crafting; gluing things to other things!  I had this gunmetal finish filigree plate stashed away for a special project, I'm super happy I finally used it.
And my absolute favorite of the batch, my Get Smart earrings!  I had a box of these old bingo-style tokens, and once I saw these two tiles I just had to make something with them.  A bit of dremel work turned them into neat beads.  And I can't resist adding chain tassels to anything.  I wear these all the time now!  So far nobody has gotten the reference, but someday they will and that person will be my new friend FOREVER.
As much as I enjoyed designing for myself for a week, I'll be happy to go back to working with other inspirations.  My color palate for personal wear is super monochrome, and I really do enjoy working with colors!  Just not wearing them.  Expect a color explosion next week to compensate!  Thanks for checking in, and we'll catch you next time!

Sunday, December 16, 2012

Week 35: Picture This!

I admit it, I've been a very very bad blogger.  It turns out I'm great at consistently making things, but not so much at posting them.  In fact, although this post is marked for the week of 12/9, and the items were created the week of 12/9, I'm actually posting this the week of 3/18.  It turns out a project, project blog, health problems, job, and new etsy store was a bit more to bite off than I could chew.  But I'm getting caught up, and we're almost at the end of the 52 weeks project!

This week I decided that I was going to start using the stockpile of images I've hoarded over the past few years.  Old bits of comic books, magazine pictures, and neat stuff I've printed from the internet takes up a full drawer in my craft room.  So I went ahead and picked my seven favorites and worked them into these nifty items:

Morpheus ring
I have this old beat up copy of  'The Kindly Ones' that has survived a house fire, a basement flood, and four moves to three different states.  Occasionally I'll take a picture out of it and make something suitably nerdy; this is my Morpheus cocktail ring.  : )  Disapproving Dream Lord Disapproves.
Black and White Horror Keychain
This fun guy was born of my getting sick of losing my keys in my purse.  I downsized my key-chain a few years ago, and now I can never find the damn things when I need them.  The bezel was a Michael's clearance special that I pried the sticker out of.  Add some Bela (Lugosi, that is) and some red glitter and boom!  You've got the only vampire sparkles I'll ever need.
Rider Waite High Priestess Pendant
My fascination with Tarot goes way, way back.  While I don't use it for readings, I have a serious love of the art style in the Rider Waite deck.  In particular, I've always been fond of The High Priestess; I think it's the crescent moon at her feet that really seals the deal for me.  The pendant base is made out of polymer clay, I use ModPodge to attach the image  and sealed it with Dimensional Magic.  

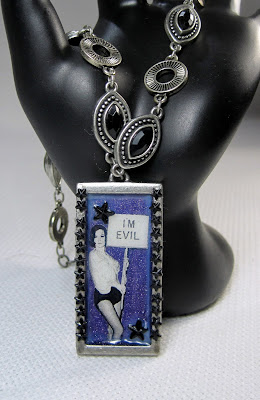
Black and White Horror Necklace
Yet more proof that I'm a horror nerd.  I don't know that I've ever seen someone more beautiful or regal than Elsa Lanchaster in her classic "Bride" pose.  The bezel is actually filigree pendant from Michael's that had a hollow back; I sealed it with a piece of scrapbook paper and liberal use of Liquid Urethane glue.  A little Dimensional Magic, the picture and some rhinestones and you've got 

Black and White Photo Necklace
Yet another ode to the awesomeness of Dimensional Magic.  The picture is a neat find from somewhere long forgotten on the interwebs.  But isn't she grand!?  My only complaint about this piece is that I should have done two layers of DM for curing; I tried to do it in one and it came out slightly opaque around the edges.
Comic Book Sandman Pendant
And to prove that Modpodge doesn't get all the fun, here's a pendant I made of Neil Gaiman's Destiny using Glossy Accents.  Woohoo!  The pendant is another Michael's find that I pried the original picture off of.  It was this funky bronze color that I wasn't super fond of, so I painted over it and then roughed it up a little bit to give it an old, battered look.
Altered Art Shattered Earrings
And last but not least, my Queen of Hearts earrings!  A scrapbooking punch and these earring bezels from the Industrial Chic line, an old playing card, plus some Crackle Accents = awesomeness.  It was pure serendipity that the punch and the bezels were the same size, but now that I know they are I see a lot of these types of earrings in my future.
This didn't even begin to make a dent in my ephemera stash, so I'm sure I'll be trotting out some more picture based pieces soon.  Thanks for reading!

Sunday, December 9, 2012

Week 34: Altered Key Week

Recently, I've come into possession of a large stash of old door keys.  As anyone who has even glanced at this blog can tell, I love gluing things to other things.  I've made some altered keys in the past, but I've had a lot of designs that got put on hold because I ran out of old house keys of my own.  With my new bounty I finally got a chance to try out some of my new designs!
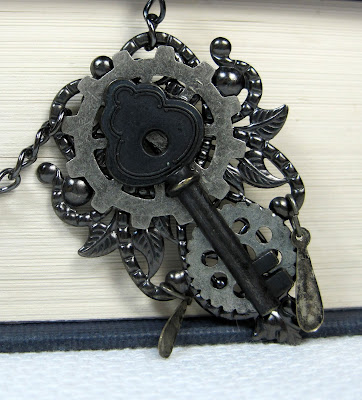
Steampunk Key Pendant
I have a lot of gears, and I really like gluing them to things.  This key uses a cluster of gears, along with a filigree heart adorned with a gear to create a neat key pendant.
Steampunk Key Pendant
No gears on this one!  I though it would be fun to add one of these lock charms I've been hoarding to a key.  Lock and key all in one! 
Flower Key Pendant
This cool filigree charm has been aching to go on a key for some time.  Once I glued it on, it looked a little out of balance, not to mention washed out and monochrome, so I added a pop of color with these cute metal flower charms I got from the scrapbooking section.
Steampunk Key Pendant
A clock charm, a brass charm, and a hex nut all come together to make a nifty steampunk style altered key pendant.  I softened the edge a little bit with another one of those metal scrapbooking flowers.

Steampunk Key Pendant
This key got the works!  I added filigree leaves, a flower charm, a keyhole charm, and some gears to this key.  I think it looks kind of like a dragonfly key.  But that might just be me.  The layering looked weird through the keyhole, so I added some enamel glaze to give it some coverage.  
Steampunk Key Pendant
Yet another keyhole and gear key pendant.  Are we beginning to notice a theme this week?  I didn't intend for most of my altered keys to turn out so steampunk-ish, but the keys themselves just match with that style so well.
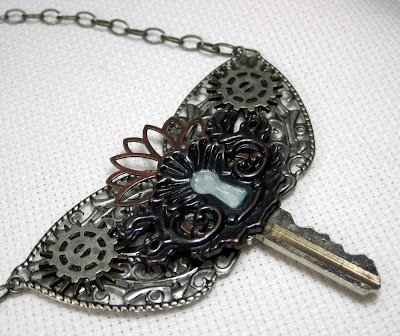
Steampunk Key Pendant
And finally, more gears!  This time I layered some gears with a cameo and  filigree charm that I antiqued myself.  : )  I really like the pop of mint color on this one; it's unexpected and makes the overall piece seem kind of cheerful.
I have so many nifty keys that there is bound to be another round of altered key jewelry before the project is over.  I'll try to wait a few weeks before repeating a theme, but I'm so excited that the ideas are just overflowing.  Well, I'm off to glue my fingers together again.  See you next time!

Week 33: Ring Week, Round 2

Before this week's projects, I hadn't tried wire wrapping my own ring shanks in a reaaaaaaaaally long time.  Years, even.  I didn't have a lot of luck the first time I tried, and it really put me off the whole making rings idea.  But this time around I had several more years of wire wrapping experience and an actual ring mandrel to use which helped immeasurably.  While none of the results are perfect, none of them are too bad for what basically amounts to practice pieces.

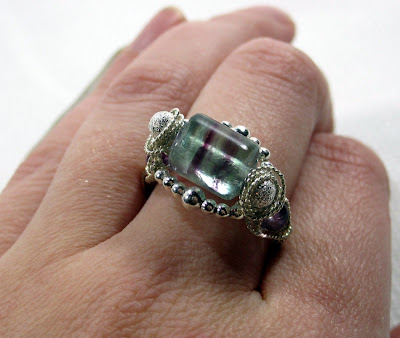
Fluorite Vortex Ring
Traditional "vortex" style wire wrapped ring with a fluorite focal bead..  This was my first attempt at wire wrapping a ring shank, and while the focal piece looks good, the shank itself is kind of wonky.  Lesson learned!  My next experiments improved greatly from learning what went wrong with this piece.
Wire Wrapped Ring Shank
This ring shank was made from a single piece of 16 ga wire, which I then shaped  and added the eyes to.  Then I added an amazonite bead and some bead caps, and used the eyes to secure the focal beads.  This ring was also a learning experience; it is huge!  The next time I make this style of ring I'll be sure to use less wire for the shank so it can actually fit me.  : )
Twisted Wire and Stone Ring
This ring was the beginning of my real experimentation.  I decided to make a ring that had a beaded frame around the focal bead.  The design turned out pretty well, it isn't exactly symmetrical but that's ok for a first try.  When I do end up making this style again I think I'll steer clear of using twisted wire: it's super fancy and adds a very refined look to a piece but it's much harder to work with than regular wire.
Coral and Turquoise Ring
About here is where I really started to hit my stride.  I have these cool double drilled coral beads, and I realized that the natural curve in them meant they'd make great additions to a ring.  I went ahead and wrapped the ring shank, then secured the coral bead.  The coral bead looked pretty bare on its own, so I added some wire wrapped lapis, onyx, silver,and turquoise beads to give it some extra embellishment.  The results are quite fancy!


I liked the style of the coral ring so much, I decided to make a bonus project for this week and used the same technique again!  This time I didn't add a focal bead, and simply wire wrapped larger beads in the same style as the embellishing beads on the coral ring.  I used a larger wire gauge to give the ring some stability.  All in all I think this ring is pretty great, and it's an excellent example of how one technique can look amazingly different when you use different materials!  
Copper and Quartz Point Ring
Once again, I couldn't resist using some of those double terminated quartz crystals that I have.  Instead of doing a vertical wrap like I did last week, I tried wrapping this piece horizontally.  While it's not the fanciest of the rings this week is is my absolute favorite.  I'm going to wear this until it falls apart!
Autumn Jasper Wire Wrapped Ring
Right about here is where I decided to try and get super fancy .  I wanted to see if I could wire wrap a cabochon onto a ring base.  The answer is yes, but it takes a hell of a lot of time!  I used this cool "spider web" technique where you wrap four wires into a star shape, creating eight prongs.  Those prongs are then used to secure the cab.  Because the back of the ring was so much smaller than the front, I overlapped the prongs and secured them by making spirals so the cab wouldn't fall out.  I think I'll want to try this style again and see if I can find a way to secure the cab without covering quite so much of it up.
Fluorite Cabochon Wire Wrapped Ring
Finally, my favorite of the batch! Learning from my cabochon wrapping adventures above, I chose a smaller stone and parcel wrapped it.  I used lots and lots of strands of 26ga wire instead of using just a few in 22 ga wire.  This allowed the stone to shine through, and the ring isn't quite as busy as the one above.  Sadly, it turned out to be a hair too small for me to wear, so I'll have to find it a good home.
Finally, I seem to have gotten over my ring-making hump.  I expect that you'll see more rings before this 52/7 project is over, as I'm way less shy about experimenting now.  Yet one more great thing to come out of making myself make seven things a week.  I'm surprised that after 33 weeks there are still so many projects that I've meant to try and haven't gotten around to yet.  I'm beginning to wonder if I'll need a second year to get through everything I want to do!  : )  I'm sure I'll feel differently when tax season is upon me, but for now I'm all hyped up.  See you next week!

Sunday, December 2, 2012

Week 32: Ring Week, Round 1

I love rings.  Well, I love wearing them, anyway.  I haven't really tried making rings before, and I realized that this was a pretty big gap in my jewelry making adventures.  So I went hunting and found seven different types of "ring blanks" to embellish.  This is what I came up with:
  
Flower Cocktail Ring
This ring base was one that had a single eye in the middle of the band.  I think it was for attaching beads on headpins to make one of those cool cluster rings.  But while fiddling around I realized that the eyelet fit perfectly into some flower components that I had.  I domed one of my gears to help it fit into the design, and then stacked them all onto the eyelet, securing them with wire and a sparkly copper bead.
Clock Key Ring
This ring is maybe the most basic of the week.  The ring base for this one was a plain brass band with several different holes in it.  I'm really not sure what it's intended use was, but I used the holes to anchor some wire, then wrapped this cool clock key charm I had onto the base.  Simple, but fun!
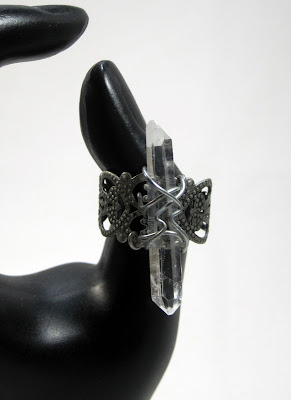
Double Terminated Crystal Point Ring
I love quartz crystal points.  I came across a bounty of them at the Crystal Connection, a local shop for VA rockhounds.  When I found these filigree ring bases, I just knew I needed to wire wrap a crystal point onto one.  I've had some very cool crystal point rings in the past, but they've all gone out of my life now.  I'm crazy excited to have one again!
Candy Ring
I love sprinkles!  And I've wanted to expand my experimentation with resin.  This ring base with a deep bezel seemed to be the perfect opportunity to combine the two.  I used a UV curing resin because it takes so much less time to set than regular resin, but I had issues with teeny tiny little bubbles forming.  By the time they rose to the surface, the resin had already started to set.  I think that UV resin will be great for some projects, but the sprinkles just had too many gaps for air bubbles to hide in.  Still, while not perfect it is perfectly wearable!
Sculptural Industrial Ring
This ring began as some sort of fidgety meddling on my part, and quickly became something extra crazy.  The ring base is a neat domed circle with an eye in the middle for attaching beads.  I happened to have big dish of safety pins sitting on my craft table, and started putting them through the eye just to see what it would look like.  A few quickly became several, which became many, which became many many, which became lots.  (Pratchett fan!)  Once I couldn't fit any more onto the base, I started stacking safety pins on top of each other.  I really love the result;  it's so much more sculptural than anything I've done in awhile.
Steampunk Gear Ring
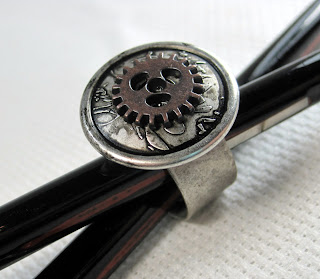
The base for this ring was what most people think of when they think of a standard ring blank, a band with a flat surface for affixing some embellishment.  I've been holding onto these cool etched buttons for a long time, and this seemed like the perfect opportunity to use them.  I had to file the back of the button flat, but that was the most work I did for this project.  Other than that it was just glue, glue, glue.  Still, the final results are pretty darnn cool.
Wire Wrapped Stone Ring
This ring turned out so much better than I thought it would!  The ring base is pretty funky; it's a standard adjustable band but it has this weird filigree flower type bit on the front for affixing things to.  The flower isn't flat, so I'm not sure what exactly it was intended for, as it doesn't seem to be made to hold glue or anything like that.  I decided to use it to wire wrap as it gave me a pretty solid anchor point.  I had this itty bitty snowflake obsidian donut that I wrapped onto the base, then embellished it with some tiger eye beads and a nice round quartz bead. 
All in all, I'm pretty happy with the way that most of the projects turned out, but using pre-made ring bases was limiting.  That's why I've decided that next week I'm going to make seven different rings using my own wire wrapped bases.  I'll see you then!

Sunday, November 25, 2012

Week 31: Ruby's Week!

I am completely lucky in that I know some of the coolest people in the world.  One of them, Ruby Funk, was awesome enough to send me a package of jewelry supplies that she no longer used.  Who doesn't love presents?  There were some truly cool things in that package, and I decided that I'd use her materials as the main components in this week's jewelry bonanza.

"Vine" wire wrapped earrings; The earring base and amber beads were Ruby's contribution to this project.  I had so much fun wrapping and weaving the amber beads.  I <3 amber="amber" and="and" beads="beads" colors="colors" great="great" shapes="shapes" such="such" td="td" these="these" were="were">
Silver Dangle Charm Earrings
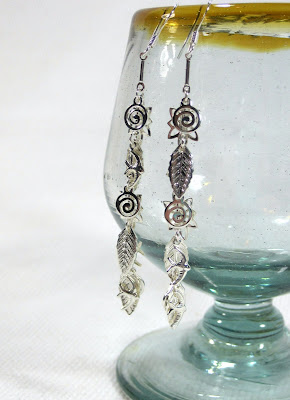
Funky charm earrings.  These cool spiral, leaf, and starburst charms were in the package; I provided the ear hooks and charm chain.  : )  They're all jingly when you wear them.
Moon Earrings
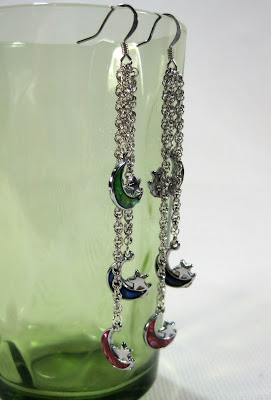
Crescent moon dangle earrings.  These moon charms came off a cool bracelet that was in Ruby's wonderful gift box.  I took them apart, clipped off the eye on the bottom of each, and used a chain that Ruby provided to make these earrings. Only the ear hooks are from my stash.  : )
Copper and Jasper Necklace
Extra Long Copper and Sky Jasper necklace.  The only component from Ruby's stash are the actual jasper pieces, but as soon as I saw them I got this design stuck in my head and couldn't help but make it.
Gold Filigree Choker
This necklace is the oddity of this week for sure.  Everything else is kind of earthy and organic, and this is quite dressy and formal.    The large gold filigree and crystal components came from a bracelet in the wonderful treasure box.  I saw the bracelet and immediately went "Ooh!  This needs pearls!".
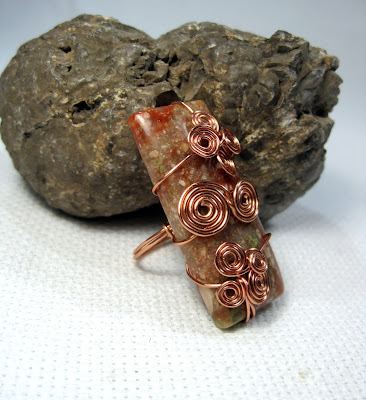
This is my favorite piece of the week.  The stone component that Ruby sent me is so cool!  I don't know what kind of stone it is, I'm guessing it's a jasper of some sort.  I think the multiple holes were meant for making it the base of a multi-strand necklace, but I really wanted to wire wrap them.  I'm pretty happy with the results; now I just have to figure out how to find more of these multi-drilled stones!
And last but not least, the extremely close runner up to my favorite project of the week.  Ruby sent met these very cool lava stone beads, and I really wanted to use them.  But I also wanted a pop of color.  So I went through my paint supplies, and found my liquid gilding pens.  I tried out one stone, and it turned out perfectly!  The paint pen coated the surface in a cool metallic color, but left the nooks and crannys of the stones untouched.  
I absolutely must give a huge thank you to my dear Ruby, who provided me with some amazing materials that really let me stretch my creative muscles.  I always enjoy the challenge of working with items I didn't pick myself, and these really gave me a creative jump-start.  I was kind of in a slump, repeating a lot of the same ideas and themes, and this got me back on a better path.  Thank you Ruby!  I <3 ee="ee" i="i" nbsp="nbsp" nd="nd" next="next" of="of" p="p" rest="rest" the="the" too.="too." week="week" you="you">