A lenient twist on the "item a day" craft challenge

The "item a day" craft challenge has always intrigued me. But it's a huge commitment! Lots of crafters have work, families, and other obligations that may prevent them from crafting every single day. So I decided to see if I could make 7 things a week. Let's see how long I can keep this up.
Showing posts with label Keys. Show all posts

Sunday, February 24, 2013

Week 45: Gears Galore

It's steampunk o'clock again!  The more popular the style becomes, the more materials seem to show up at my local craft store.  I have to admit, the lure of antiqued metals and gears is too much for me to resist.  So in another great showing of my favorite crafting style (gluing things to other things), I decided to work with my considerable steampunk components stash this week.
Clock necklace with key and gear
Clock face, key, and gear pendant on leather.  I love these little flat keys from the scrapbooking section at Joanne's!  They look great and are super easy to attach to other components.
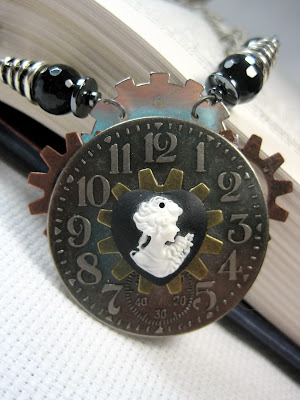
Steampunk style clock and cameo necklace
Clock face, gear, and cameo necklace.  I'm really feeling the clock-y goodness this week!

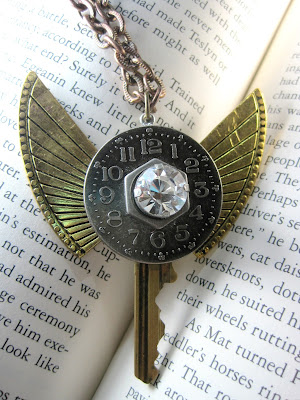
Steampunk style winged key necklace
Altered key with clock face, hex nut, crystal, and weathered art-deco style "wings".
Fancy steampunk style altered key pendant
Another altered key, this time with gears, scroll work, and a neat little mirror!
Gear and cog pendant
Filigree pendant with gears and hex nut.  I created a blue patina on the base for the pendant  by using the ammonia and salt technique.
Altered steampunk style key necklace
Altered key with keyhole, gear, and fan "wings".  The fans came from the clearance isle at Michael's, and I just knew they had to go on a key!
Steampunk style clock and gear necklace on leather
And back to clock faces!  Clock face with gears and washer on antiqued brass base.  The pendant is threaded on leather, and I added a few gears to keep it company.

Sunday, December 23, 2012

Week 36: I Feel Special

It's been pointed out to me that while I make an awful lot of stuff, I don't normally make things with myself in mind.  So this week, I decided to only make things that I knew I would use, and use regularly.  It turns out that my aesthetic is mostly black and silver based.  Big surprise there!  But it's kind of neat; I feel like I have a cohesive "line" of accessories for my everyday use now.  So, uh, Merry Christmas to me?

Feathered Brooch
Hat Pin!  Just not in the traditional sense.  I love adding a bit of extra flare to my hats.  The button was a super cool find at Joann's, and I  used epoxy clay for the first time to put the feathers and button together on the pin back.  For a first attempt I'm pretty pleased.  Plus, giant feather poof for my hat!
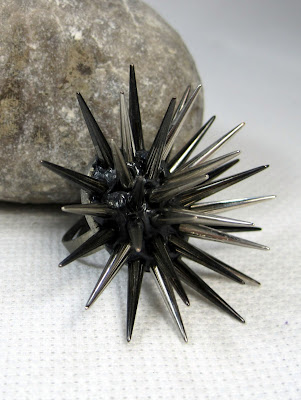
Spike Ring with Epoxy Clay
My second experiment with epoxy clay.  The ring base and spikes are both from Michael's;  the spikes appear to be some sort of plastic so the ring is really lightweight!  While this is totally not a work appropriate ring, I' think I'm going to end up wearing this a lot.  Plus I think it may double as a self-defense weapon in a pinch.  :)
Tassel and Rhinestone Vintage Style Necklace
WWTWW?  Or, What Would Tom Waits Wear?  If he was a girl, I think it'd be this necklace.  This bad boy is much fancier that I'd normally go with, but a girl's gotta play dress up sometime, right?  
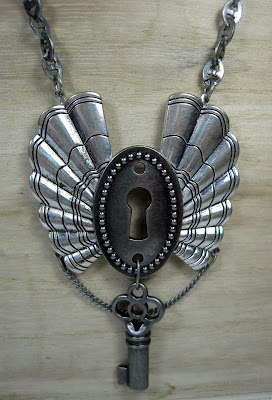
Steampunk Style Keyhole Necklace
I about peed myself when Michael's came out with their Art Nouveau  line of jewelry  components.  I was particularly taken with the fan-style wings.  Add a keyhole and skeleton key charm, and it's perfect!  I'm surprised at how much I wear this necklace.  It's pretty much a staple of my wardrobe now.
Steampunk Style Key With Wings Necklace
And if I don't feel like wearing the super sized version from above, here's a downsized version for more casual wear.  Keys and wings.  I don't think you can go wrong with that combo!
Steampunk Style Clockwork Key Necklace
Once I got my box of keys out, I just couldn't stop!  These flat backed keys are from the scrapbooking isle at Joann's, and they're perfect for my favorite type of crafting; gluing things to other things!  I had this gunmetal finish filigree plate stashed away for a special project, I'm super happy I finally used it.
And my absolute favorite of the batch, my Get Smart earrings!  I had a box of these old bingo-style tokens, and once I saw these two tiles I just had to make something with them.  A bit of dremel work turned them into neat beads.  And I can't resist adding chain tassels to anything.  I wear these all the time now!  So far nobody has gotten the reference, but someday they will and that person will be my new friend FOREVER.
As much as I enjoyed designing for myself for a week, I'll be happy to go back to working with other inspirations.  My color palate for personal wear is super monochrome, and I really do enjoy working with colors!  Just not wearing them.  Expect a color explosion next week to compensate!  Thanks for checking in, and we'll catch you next time!

Sunday, December 9, 2012

Week 34: Altered Key Week

Recently, I've come into possession of a large stash of old door keys.  As anyone who has even glanced at this blog can tell, I love gluing things to other things.  I've made some altered keys in the past, but I've had a lot of designs that got put on hold because I ran out of old house keys of my own.  With my new bounty I finally got a chance to try out some of my new designs!

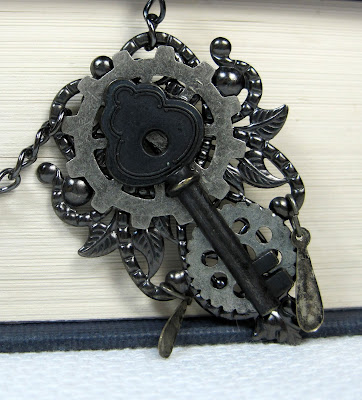
Steampunk Key Pendant
I have a lot of gears, and I really like gluing them to things.  This key uses a cluster of gears, along with a filigree heart adorned with a gear to create a neat key pendant.
Steampunk Key Pendant
No gears on this one!  I though it would be fun to add one of these lock charms I've been hoarding to a key.  Lock and key all in one! 
Flower Key Pendant
This cool filigree charm has been aching to go on a key for some time.  Once I glued it on, it looked a little out of balance, not to mention washed out and monochrome, so I added a pop of color with these cute metal flower charms I got from the scrapbooking section.
Steampunk Key Pendant
A clock charm, a brass charm, and a hex nut all come together to make a nifty steampunk style altered key pendant.  I softened the edge a little bit with another one of those metal scrapbooking flowers.

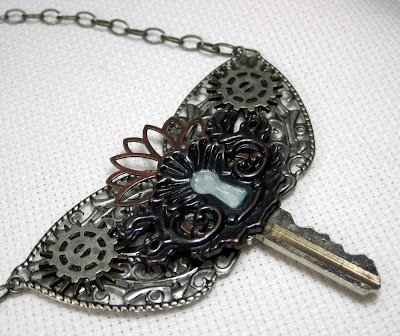
Steampunk Key Pendant
This key got the works!  I added filigree leaves, a flower charm, a keyhole charm, and some gears to this key.  I think it looks kind of like a dragonfly key.  But that might just be me.  The layering looked weird through the keyhole, so I added some enamel glaze to give it some coverage.  
Steampunk Key Pendant
Yet another keyhole and gear key pendant.  Are we beginning to notice a theme this week?  I didn't intend for most of my altered keys to turn out so steampunk-ish, but the keys themselves just match with that style so well.
Steampunk Key Pendant
And finally, more gears!  This time I layered some gears with a cameo and  filigree charm that I antiqued myself.  : )  I really like the pop of mint color on this one; it's unexpected and makes the overall piece seem kind of cheerful.
I have so many nifty keys that there is bound to be another round of altered key jewelry before the project is over.  I'll try to wait a few weeks before repeating a theme, but I'm so excited that the ideas are just overflowing.  Well, I'm off to glue my fingers together again.  See you next time!

Sunday, November 18, 2012

Week 30: Keys to the Kingdom

I found a bunch of oversized skeleton keys in the dollar bin at my local Michael's store, and I instantly knew that they were going to be the theme of this week.  They're all pretty large and similar in design, and I thought it would be fun to see how many designs I could come up with to use was was essentially the same item in different ways.  Overall I'm pretty happy with how things turned out; there are a couple of designs that aren't as strong as the others but overall I feel pretty happy for making seven different things out of the same key item (pun totally intended).

For this key I filled the top with resin that I added some metallic blue powder to, then added some star cut outs and rhinestones to give it a sort of "space" feel.  I'm not 100% pleased with the results, but the concept is good and if I can find some more of those keys I'll try again!
I decoupaged some origami paper to this key, and added some cut ribbon to give it a bit of "fringe" up at the top.  Again, I'm not 100% pleased with the results, but it was totally worth a try!
This key I painted with nailpolish to give it a Tim Burton sort of feel.  The detail work at the top took forever with my hands, but the bottom spiral was pretty easy thanks to some masking tape.  : )
For this key, I added a butterfly that I got off a Goodwill bracelet.  I think this might be my favorite of the group this time, even if it is the hardest to photograph  .
I turned this key into a charm necklace by adding a bunch of odds and ends I had  from various charm packages I got at craft stores.  A bit of wire wrapping on the end evened the key up so it hangs nicely as a necklace.
I wire wrapped the length of this key, and added a whole bunch of different accents like gears, freshwater pearls, tiny heart charms, and an itty bitty cameo.
This key I turned into a lariat necklace.  I didn't want to run the chain directly through the keyhole, so I added a large jump ring to the hole at the bottom and ran the chain through that.  It seemed to balance the necklace better and didn't cover up the keyhole plate with chain.  I also added three freshwater coin pearls as an accent to keep it from being too plain.
I know I don't get too many points for creativity this week as they're all necklaces, but honestly the keys were just too darn big to do anything else with!  Other than the lack of variation in the end product, I'm happy with the variety of the necklaces themselves.  Coming up with seven different styles was pretty challenging, and I'm happy that it encouraged me to try some things that I wouldn't ordinarily have done.  That said, I might take it easy next week.  : )  Thanks for stopping by!