A lenient twist on the "item a day" craft challenge

The "item a day" craft challenge has always intrigued me. But it's a huge commitment! Lots of crafters have work, families, and other obligations that may prevent them from crafting every single day. So I decided to see if I could make 7 things a week. Let's see how long I can keep this up.
Showing posts with label hardware. Show all posts

Sunday, February 24, 2013

Week 45: Gears Galore

It's steampunk o'clock again!  The more popular the style becomes, the more materials seem to show up at my local craft store.  I have to admit, the lure of antiqued metals and gears is too much for me to resist.  So in another great showing of my favorite crafting style (gluing things to other things), I decided to work with my considerable steampunk components stash this week.
Clock necklace with key and gear
Clock face, key, and gear pendant on leather.  I love these little flat keys from the scrapbooking section at Joanne's!  They look great and are super easy to attach to other components.
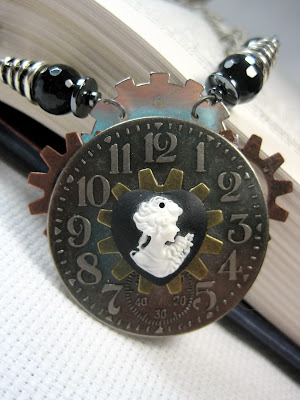
Steampunk style clock and cameo necklace
Clock face, gear, and cameo necklace.  I'm really feeling the clock-y goodness this week!

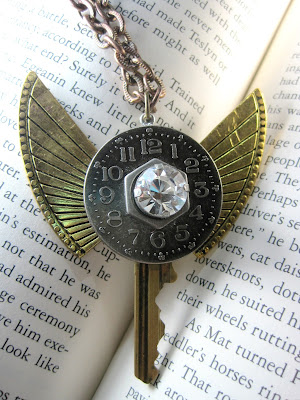
Steampunk style winged key necklace
Altered key with clock face, hex nut, crystal, and weathered art-deco style "wings".
Fancy steampunk style altered key pendant
Another altered key, this time with gears, scroll work, and a neat little mirror!
Gear and cog pendant
Filigree pendant with gears and hex nut.  I created a blue patina on the base for the pendant  by using the ammonia and salt technique.
Altered steampunk style key necklace
Altered key with keyhole, gear, and fan "wings".  The fans came from the clearance isle at Michael's, and I just knew they had to go on a key!
Steampunk style clock and gear necklace on leather
And back to clock faces!  Clock face with gears and washer on antiqued brass base.  The pendant is threaded on leather, and I added a few gears to keep it company.

Sunday, September 9, 2012

Week 21: Hardware Week

In preparation for my move, I've been spending an awful lot of time at Lowes.  While I was there, I got a little lost in the hardware isle and decided to pick up some components for crafting!  When I was a much younger "grunge grrl" I had a necklace that I made out of old, rusty hex nuts that I found in my garage.  I've been in love with the industrial look ever since.  I know a lot of the stuff I make is girly, but I mainly craft for other people or to challenge myself; I don't wear most of what I make.  I usually like my accessories with an edge.  So this week I went all out and made stuff that I'd be more than happy to wear!

Chainmaille made from locking washers!  I added different metallic coatings to the washers, then added some patina before putting them together in the Japanese 4 in 1 weave style.

Wire-Wrapped Locking Washer Hardware Earrings.

More Locking Washer Hardware Earrings

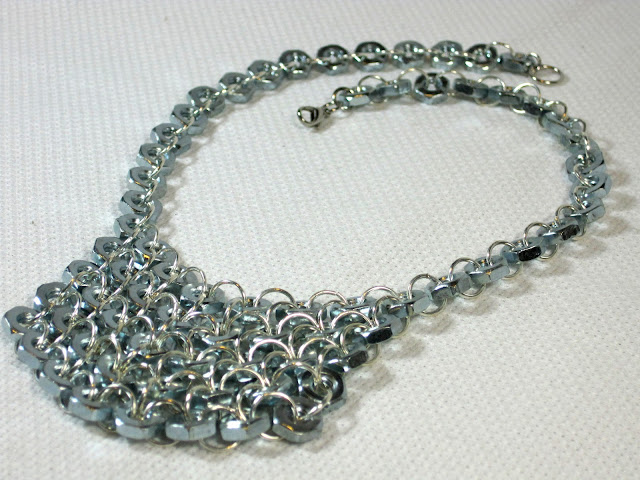
Hex Nut Chainmaille Necklace.  This bad boy is really heavy!  It is put together with hex nuts in the Japanese 4 in 1 weave style.

Hex Nut and Locking Washer Earrings.  These were a "bonus" design for this week because they're pretty much the same as the trio of locking washer earrings, but without a hoop.  : )

Hex Nut and Washer Earrings with Chain

Bracelet Made From Brass Hinges

Tiny Lightbulb Earrings!  I found these in the hardware isle in one of the drawers marked "Science Fair Materials".  There is a lot of fun stuff in that drawer!
I am really happy with the results of this week's crafting.  It is really fun to use non-traditional materials, such as hardware and other "found-item" components, when making jewelry.  Thanks for looking and I'll catch you next time!

Sunday, July 29, 2012

Week 15: Bracelets Abound!

I don't know what kind of can of worms I opened up by flirting with bracelet design, but I'm hooked!  This week is now the first back to back theme week of the year; mostly because I just wanted to make some more bracelets.  And here they are:

This was a fun bracelet I made by raiding my overabundant hook-and-eye stash.  Add jump rings and a clasp and voila!  Instant bracelet.
Leather with beads and a wire spiral
Leather with a small (and functioning!) hinge.
Multi-strand bronze metallic leather bracelet.  There are eight strands of the leather, but you can't quite see them all in the picture.  This one may be my favorite to wear of the new batch.
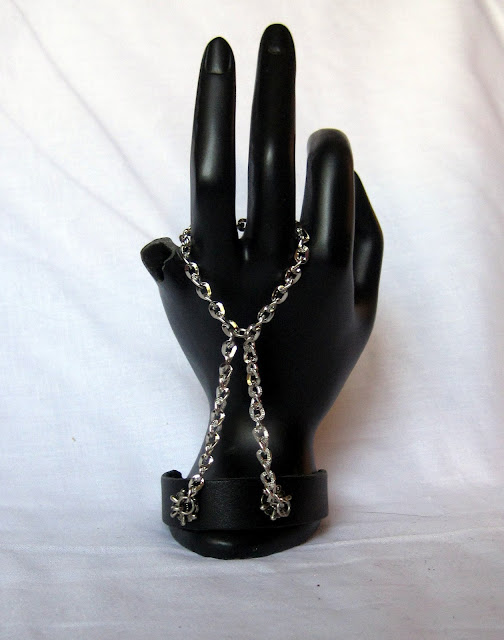
Leather cuff with eyelet studs and chain for a hand wrap.  Whoo, fancy!
Wire circle with wrapping and  various semiprecious stones.  I lied.  This one is my favorite to wear of the batch!
And here is the final (and most time consuming) bracelet of the week!  Two leather straps connect a strip of Euro 4 in 1 chainmail.
I got the design for the Euro 4 in 1 bracelet from an excellent book by Laura Poplin called "Unconventional Chain Mail Jewelry".  I highly recommend checking out this book if you are in the intermediate stage of chainmail construction and are looking for new directions to take your designs.  Expect to see more projects inspired by the book in the future!

Sunday, April 29, 2012

Week 2: Queen of Hearts

Soooooo.... when I decided last week to go with complicated I didn't quite realize how much time I was going to end up sinking into this week's projects.  For a first try I'm quite happy with the results, so it was totally worth it.  I've always been intrigued by polymer clay; I've seen so many people on so many websites do AMAZING things with the stuff.  But every time I've tried to replicate some of the simpler projects I've been confronted with the fact that I can't sculpt anything for crap.  I shelved all my polymer projects for about a year, and hadn't touched the stuff until this project.  While cleaning up my craft drawer I found the remains of my polymer clay excursions and decided to using it up rather than dedicating a drawer to the stuff.

In one of my many craft books or magazines (I unfortunately don't remember which one so I can't give them credit) I saw a neat little article on how to attach a homemade "bail" to a polymer clay frame.  It showed how to make an eyepin out of wire, then insert that into the top of the frame to create a loop for hanging.  Baking the clay secured the eyepin, allowing it to be used to hang the pendant.  I figured that if you could essentially stick an eyepin in clay and it would stay I could probably stick other metal things into clay and they would also stay.  Because my sculpting skills are so remedial, i decided to take one really basic shape I knew I could make, create several out of the shape out of the clay I had available, and embellish them in a variety of different ways.  I can make two things: Hearts and blobs.  Hearts seemed to be a better choice, so I went with that.

I created the first batch with hardware I had sitting around in the junk drawer at the house.

Hex nuts and nails are fun!
Nails again, with a screw.  I used a plastic knife from a fast food joint to add the texture.
I stabbed this one with some "gears" I had laying around.
Small brass nails attached this Tim Holtz keyhole.  The gouges were made with a very small knitting stick that I have never, ever used for knitting.

Once I had gotten started it was pretty much impossible to stop.  I ended up having a bunch of ideas and not quite the right materials to execute them.  So after a fun and productive trip to Lowes, I made batch two:
Copper siding nails are wonderful!
So. Many. Tiny. Nails.
This one is my favorite,  Hence it's status as the only pendant to actually make it to a necklace.
The addition of short silver nails with tiny heads let me use some more of those cool keyholes.
Franken-heart!  I was really happy with the small hinges I found in what appeared to be the "drawer making" isle.

I still have seven other heart bases that I haven't "finished" with wire, paint, gloss or other embellishments.  I worked at least three evenings on these bad boys during the week, and Saturday AM too.  I may have gone a little crazy, but it was so much fun. Still, I'm thinking that a slightly less labor intensive project for next week may be the key to keeping this up.